A couple of months back I visited Tom and Durrell at Luckybite to discuss some of the Olinda development. During our conversation, Durrell described one of his favourite portable radios, the Bang & Olufsen Beolit 600. I bought one.
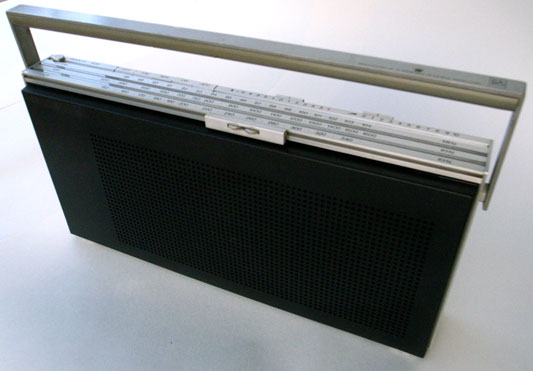
The range was produced between 1971 and 1981 and aside from its elegance and good audio quality, the detailing is very deft.
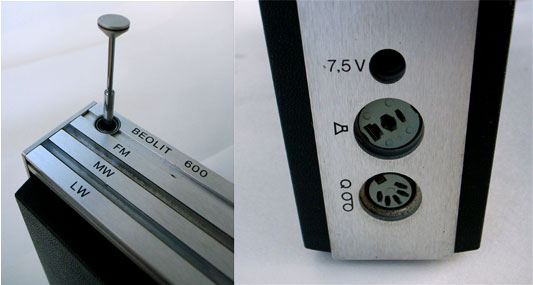
Tuning with magnets
The chassis is constructed from aluminium strips, holding plastic shells front and back. The controls for the radio are spread out along the front and back edges of the top face. On the back edge are buttons for band selection and two sliders for volume and tone. The entire front edge is a horizontal tuning slider.
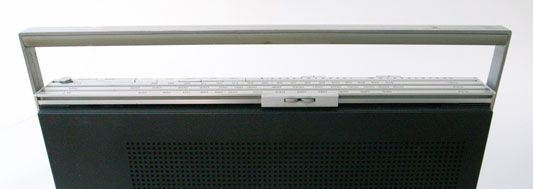

The slider can be grabbed and pushed quickly up and down the length for coarse tuning. To tune precisely the two small kinked wheels are rolled under the thumb to give fine control. The remarkable detail is in how the selected frequency is indicated:
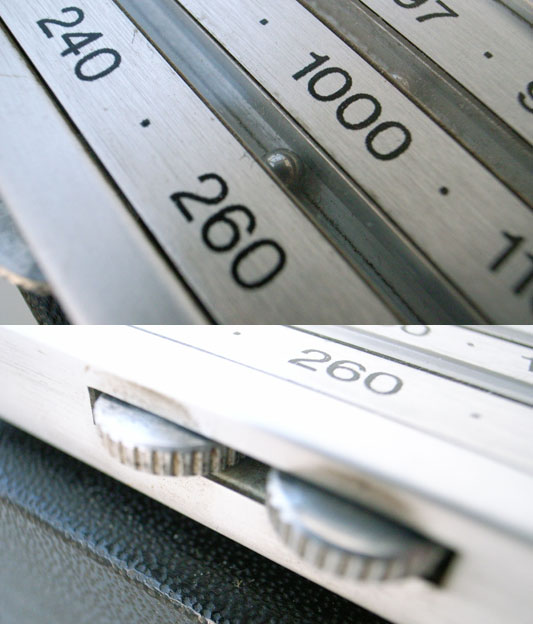
Two very small steel bearings sit in covered grooves in the aluminium chassis, one for each tuning band. The tuning slider conceals a magnet, which drags the bearings along the scale inside their grooves (the aluminium is of course unaffected by the magnetism). The position of the bearings corresponds to markings on the surface of the radio which indicates the frequency the radio is tuned to.
It’s a really nice example of celebrating functionality. There is no functional need for the bearings. The additional cost to develop and manufacture can’t possibly have made financial sense. Why not use an arrow? But tuning is what radios do, and something which articulates this most familiar function so poetically just had to be done.
I love how the furthest bearing twitches along more slowly than the closer one.
Construction
Structurally the radio is a square of four lengths of extruded and cut aluminium, with the front and back plastic shells tucked in. What’s exciting is that taking the radio apart isn’t work: there are no machine screws or self-tappers.

The base plate of the radio can slide. Sliding it a little way first unlocks the back shell. Removing the back allows the base to slide more, which releases the more rarely removed front shell. All this is achieved with a clever system of grooves and nooks.
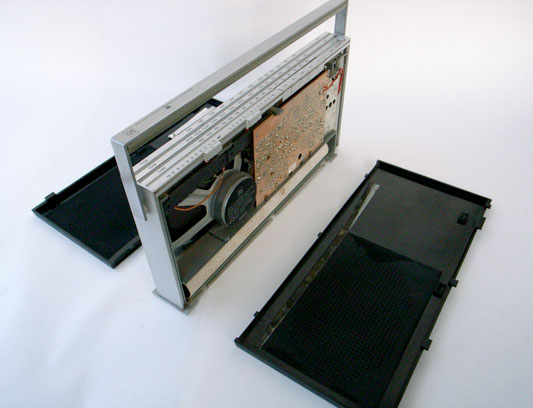
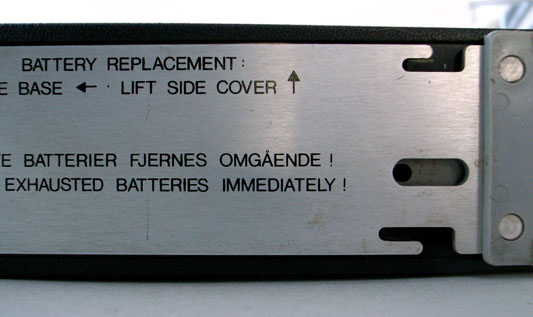
Coming off first, the back shell gives access to the battery. The front shell reveals something else.
The repair manual
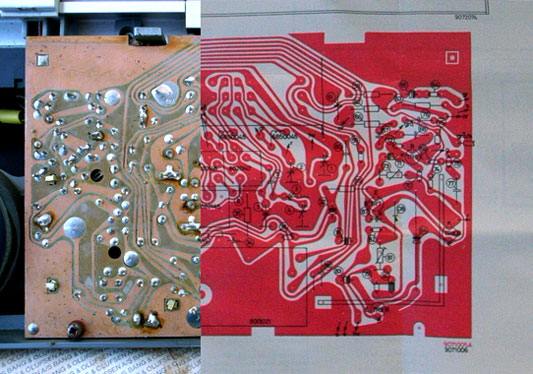
Inside the front shell, there is a little envelope. Inside the envelope there is a piece of folded paper.
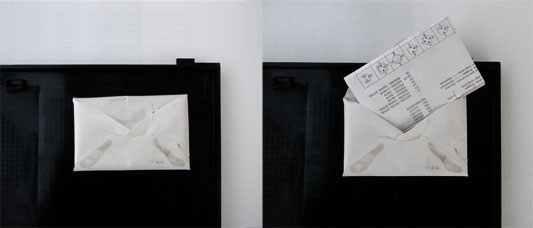
Screen printed on the paper are all the instructions for repairing the radio. There is an abstracted circuit diagram and also an image of the actual PCB. The radio contains its own data sheet, physically!

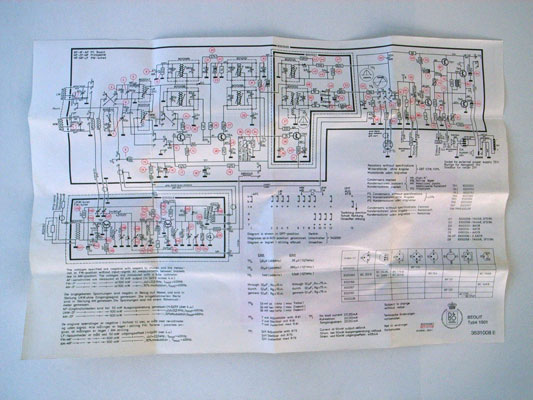
I’ve cut these last two images together to show that the PCB and the print in the diagram are to scale (the screens were probably made from the same drawing).
11 Comments and Trackbacks
1. Chris said on 20 December 2007...
Hey Jack, I really enjoyed this, thanks. Love the built-in manual! Almost spimey.
Radios used to be all about the tuning experience for me. I bought a short-wave radio last year just so I could experience that again… sad to think that as analogue services are phased out then this experience will vanish completely.
btw what does the youtube video show? It’s claiming to be “no longer available” for me.
cheers
2. Adrian McEwen said on 20 December 2007...
That is just beautiful craftsmanship and design, isn’t it?
Chris, the video shows the tuning action, and the ball bearings following the tuning. I didn’t have any problems with the YouTube video myself.
3. Ben said on 20 December 2007...
Fucking brilliant.
4. Phil Gyford said on 20 December 2007...
I’m trying to imagine the excitement on your face when you took the panels off and discovered the envelope containing the diagrams…
5. Charles Frith said on 21 December 2007...
Fuck me. That’s beyond beautiful. I’m such a radio fan too.
6. Sean said on 26 December 2007...
It is a beautiful piece of gear. My father has a shelf unit, a Beomaster 3000, that has enthralled me since I was young. I may have to indulge into one of these myself as the compact shortwave radio I purchased last year has lots to be desired in the tuning department. would love the the long slider with the fine adjustment.
7. Nico Macdonald said on 28 December 2007...
One invariably loses the manual for a product. In the short term the best solution maybe to print the manual URL on the device itself, and in the longer term to use some kind of RFID technology to pull up the Web page or display the manual on some kind of electronic device.
8. kristoffer said on 2 January 2008...
I bet you don’t examine every gadget this way! Nice. I have a couple of them myself and they are truely beautiful. For me as a dane, this is what danish design is about. Simplicity. This is the Apple-design of that time.
9. Harley said on 3 January 2008...
When I was growing up we had a few of these, along with a Beolit1000 also. They really are such beautiful units – thanks for reminding me.
10. minifig said on 3 January 2008...
I remember that we had one of these in our kitchen that worked perfectly with no faults at all for the best part of 20 years, so it wasn’t only a wonderful bit of design in looks, but also durability. The radio we replaced it with went wrong within a year, and didn’t look as great.
11. Dan Hill said on 22 January 2008...
What a beauty. I enjoyed your poring over it too. You should do this with more objects, as a series.